Good digital teaching needs a number of skills:
- Coordination: you need to be able to move between technologies to make your point and keep the flow of the session going smoothly. Good tools enable easier coordination.
- Polish: more than you might in the classroom, where students feel they “get more for their buck” because you are physically present, you need to polish your output. Tools that enable this in real time with less effort are best.
- Engagement: it’s comparatively easy in person to stop, read the room, and decide how to proceed (Q&A, discussion, continue the presentation, etc.). It’s much harder in the digital space, where we lose a lot of eye contact and microexpressions. More than ever, you have to “chunk” your process to allow time for inquiry, discussion, reflection, and utilization of ideas.
My teaching rig has been evolving over time. With funding for teaching technology upgrades scarce, and since I am not a parent, I’ve invested my own income in experimenting with new equipment. I use open-source tools, so software costs me nothing. I already owned an Apple Pencil-capable iPad going into the COVID-10 crisis, so the cost of that is built in to my assumptions (a new standard-sized iPad costs $329 with just WiFi, which is probably all you need for this process unless your home internet and home wifi are themselves unreliable).
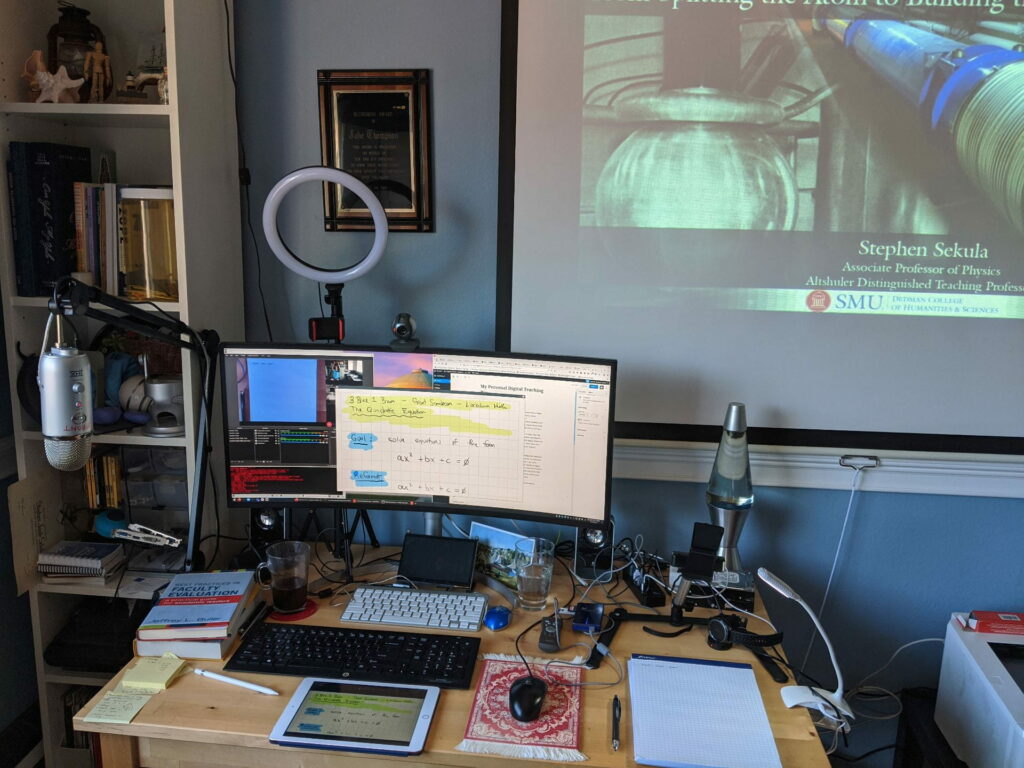
Here is a parts list, with some overall explanations of the pieces.
The Backbone
High-Speed Internet
A college professor who can get to their office and use the internet from campus should be fine. I do a lot of teaching from home, because campus is not going to be safe once students are allowed to congregate again at full population and no social distancing in their housing situations. I anyway run network services out of my home (a website, etc.), so I need a fast and reliable internet connection at home.
I pay about $100/month for business-class cable internet. We don’t buy cable TV or any of that nonsense, so we’re focused on all media delivered by internet. This plan gives up about 25Mbps download and 15Mbps upload, which is more than enough to run two Zoom meetings simultaneously (e.g. if my spouse and I are both in meetings or teaching at the same time).
A Good Desktop Computer
I like building my own, but that’s not for everyone, of course. In the modern era of high-speed internet video and high-quality audio, you need a machine with the following attributes:
- A high-quality video card
- Lots of disk space for local recording of video and audio
- A large screen or multiple screens to manage many tasks across various tools (e.g. camera, whiteboard, view of meeting participants, etc.)
- USB 3.0 or USB-C (or both).
Those are the basics. My desktop machine is a custom built. Here are the key features:
- Graphics Card: Sapphire Radeon 11265-05-20G Pulse RX 580 8GB GDDR5 Dual HDMI/ DVI-D/ Dual DP OC with Backplate (UEFI) PCI-E Graphics Card Graphic Cards ($250)
- Disks:
- Primary system disk is a fast SSD drive with 128GB of space.
- Secondary system disk is for video storage and editing, and is comprised of much slower 500GB space.
- I bought these years ago, and as a rule of thumb for SSD you pay about $1/GB and for magnetic disks you pay about $0.20/GB.
- Screen: my newest addition is an ultra-widescreen monitor to allow twice the window space as a traditional monitor. I selected a LG 34WK95C-W 34 Inch Curved UltraWide QHD Nano IPS Monitor with VESA DisplayHDR 400, Silver ($800)
- USB, at high speed, is essential if you have to move video from an HD camera to the computer for editing. While most webcams and microphones are going to be just fine with USB2.0, I recommend getting the USB speed up as high as possible to future-proof your rig.
I have a second screen, even given all the new screen real estate. A second monitor is useful for sharing or recording a whole desktop that is out-of-the-way of your visual space, where you may be working. I have a very old 1024×768 projector in the back of my office and a movie screen on the opposite wall, and this is connected into my video card as a second screen. The projector was a second-hand throwaway that was donated to me; I’ve paid for 1 new bulb in 15 years, which cost $100.
Audio Recording
- Yeti Microphone ($180): this is overkill, but I already had one thanks to an SMU Presidents Partners Grant from 2009 when I first arrived at SMU. Just get a good quality condenser microphone, which typically runs around $99 or so.
- Microphone boom arm: if you are like me, you pound the keyboard and bang your hand on the table when you talk. Get your microphone off the table! I use an InnoGear Microphone Arm Stand, Heavy Duty Mic Arm Microphone Stand Suspension Scissor Boom ($70). You want sturdy but flexible.
I don’t do anything in my office to help with echo or other sound quality issues. I cringe when I listen to recordings from my office (that echo!), but that’s because I am picky.
Video Recording
I use two webcams, one for lecture and one for documents.
- Lecture Camera: this is an “old” Logitech 1.3 megapixel webcam; you can’t even get it anymore. I like it because it has a close-able plastic shutter, for when you don’t trust an application to not record video. You should expect to spend about $50-$100 on a decent camera.
- Mount the camera up high, so that it’s aimed down at a slight angle your face. Never shoot “up the nose” – it’s a terrible view. Be able to look you camera in the “eye” to connect better with a viewing audience. You might need a stand to achieve this; my monitor is tall enough (and my chair low enough) to achieve this.
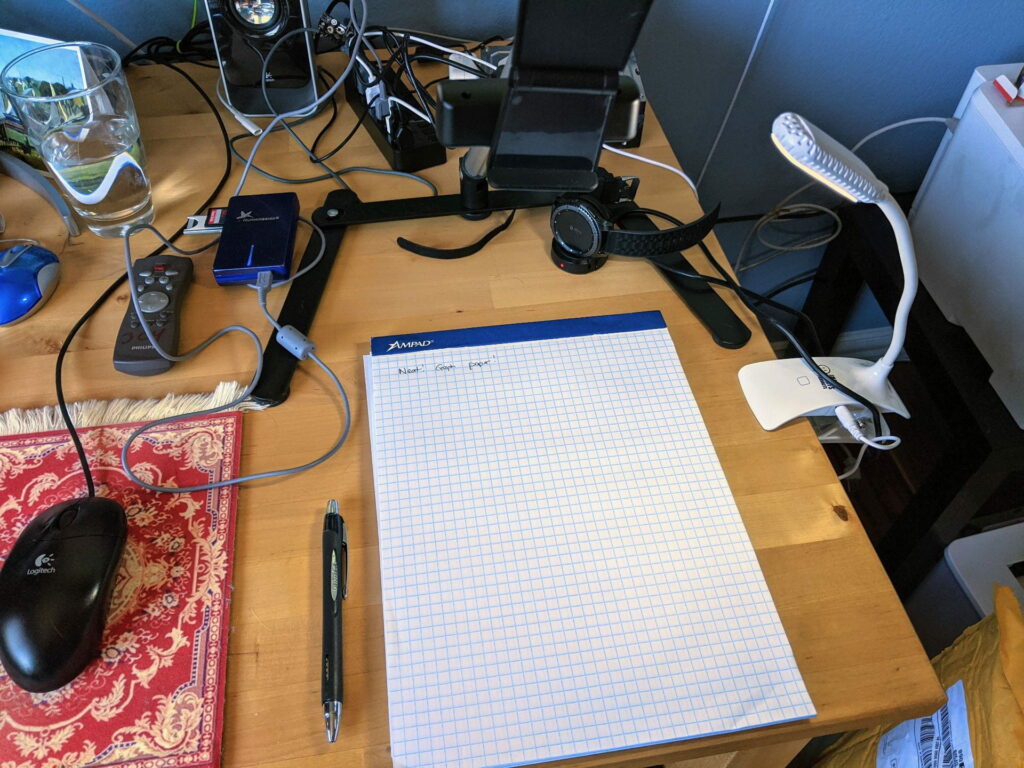
- Document Camera: I just bought a webcam for this (I did not buy a dedicated document camera, though you certainly can). Make sure it has two features: a standard camera stand mounting screw and manual focus, so you can lock the focal plane on the writing surface. Auto-focus tends to try to lock onto your hand, etc. which is much closer to the lens and then this blurs the writing. I got a stock webcam (Webcam 1080P FUVISION Manual Focus Full HD Live Stream Web Camera, $50)
- Camera Stand: I got a simple, low-profile and adjustable webcam stand. (WongPing Adjustable Webcam Tripod with Cellphone Holder, Overhead Phone Mount, currently unavailable on Amazon, but I paid about $30)
- Book light: I took one of my book lights and used it to clip to the table and illuminate the work area. Mine is an INTELLUCE Book Light ($15).
- For really high-quality video shooting, I use the Canon EOS Rebel T7i I got for Christmas last year. That’s my “movie camera” for when I really need to impress. It’s also really expensive (this will run you at least $500 for the camera and some basic lenses, a stand, etc.)
- Green Screen: to avoid the backdrop always being my cluttered home office, I got a portable and collapsing green screen. Mine is an Emart Green Screen ($200). I love it.
Whiteboarding
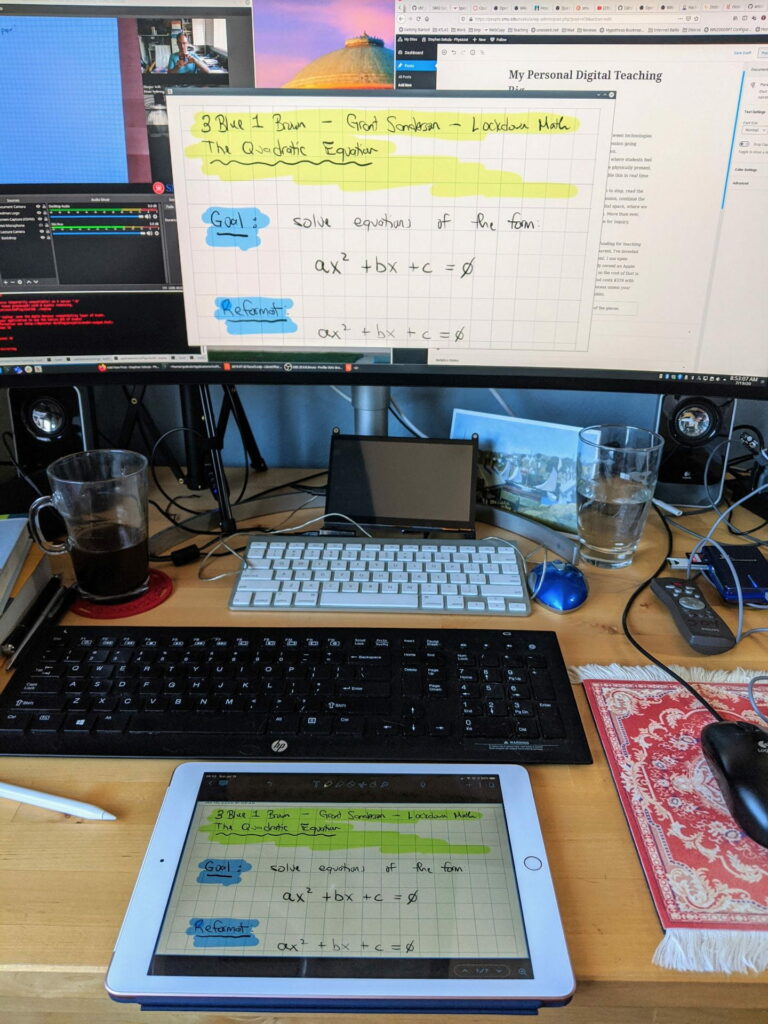
The document camera rig is one kind of whiteboard for teaching. My iPad is the other. For this, you need an Apple Pencil – it’s really the best digital writing system I’ve ever used. That’s going to run you $99-$130.
How do you broadcast your whiteboard? For the document camera, it’s just another video source. iPad and all Apple products support AirPlay, which in principle allows you to broadcast your video device over WiFi to another computer.
However, Apple famously only plays in its own sandbox, while paying lip service to Windows and Linux. Windows and AirPlay work together; if you have a Mac or Windows desktop computer, you are all good. Share away!
Open Source software rides to the rescue for Linux/UNIX. Here is how I AirPlay from my iPad to my Linux Desktop Computer:
- UxPlay: an open-source AirPlay client for Linux/UNIX
Software
Hardware is the brick but software is the mortar. Hardware is a collection of states; software is the federation of those distinct states into a functioning republic. Here is the software I use for various purposes.
- Video Meetings
- I use what I have to. Different people and institutions want different things. For SMU, I use Zoom; for ATLAS, I use Vidyo; for personal interactions, I use Skype, or Google Meet, or Zoom, or whatever. All play nice with Linux (and Windows, and Mac), for the most part, so for me video meeting software has become a background noise of arbitrary competing choices. Pick your poison.
- Lecture Recording
- I like to use dedicated software to record lectures that are asynchronously broadcast. Right now, I am a big fan of the Open Broadcaster Software suite (OBS). This allows you to quickly layout a bunch of sources in a session, and switch between sessions in real time while recording the presentation. It has a real “professional webcast” feel as a result. Once you get your sessions setup, which took me about 1 hour of time to think and plan, you just forget and go. OBS lets me coordinate the switching and layout of sources without too much thinking. It can even broadcast itself to your computer as a “virtual camera” that can be used in Zoom, etc. so you can manage your live performance using OBS.
- Video Editing
- There are many choices for Mac and Windows, at various price points. I am an open-source person. I use KdenLive to do hard core video editing (mixing clips, audio, transitions, effects, etc.). Kdenlive, like nearly all video editors or video conferencing tools, allows for “chroma keying” – the use of a green screen to overlay the green with content of your choice.
- Audio Editing
- For dedicated and free hard core audio editing, you cannot beat Audacity. This is fully cross-platform; I’ve used it on Windows, Linux, and Mac.
- Screen Recording
- For dedicated screen recording, there are many options on all platforms. On Linux, I like SimpleScreenRecorder; it’s served me for years, including capturing lecture slides and audio during in-person classes, as well as offline recording of lectures for later inclusion in more complex lecture videos (e.g. my Modern Physics lectures).
- iPad Note Taking/Whiteboarding: I love Notability. It’s not free, but it’s worth it ($9). You can AirPlay it in “presentation mode” (where just your “paper” is visible) or “screen sharing mode”, where the whole frame of the application is visible.
Other Materials
- Graph Paper Pad for the Document Camera: I like Ampad graph paper pads (about $8 for 1 thick pad)
- Uniball (Uni) JetStream 1.0mm tip pens: good ink flow, thick lines, smooth motion on paper. My absolute favorite affordable pen. ($27 for a 12-count box)
- Ring Light: If you have any bright lighting (windows) in your background, you need to front-light your face to help the camera, or it will throw off its brightness and contrast balance. I grabbed a Ring light back in the spring to aid in this. ($40) You just need good, intense, diffuse white light.
